# 部署教程
# 架构介绍
- JXWAF 系统由三个子系统组成
- jxwaf 控制台
- jxwaf 节点
- jxlog 日志系统

# 系统要求
- 服务器系统 Centos 7.x
# 测试环境部署
# 快速部署
申请一台按量计费服务器,IP 地址为 119.45.234.74 ,完成下面部署步骤
# curl -sSLk https://get.docker.com/ | bash
# service docker start
# yum install git -y
# git clone https://github.com/jx-sec/jxwaf-docker-file.git
# cd jxwaf-docker-file/test_env
# docker compose  up -d
国内网络可以参考下面命令执行
# curl -fsSL https://get.docker.com | bash -s docker --mirror Aliyunservice docker start
# service docker start
# yum install git -y
# git clone https://gitclone.com/github.com/jx-sec/jxwaf-docker-file.git
# cd jxwaf-docker-file/test_env_cn
# docker compose  up -d
# 效果验证
访问 控制台地址 http://119.45.234.74:8000 默认帐号为 test,密码为 123456
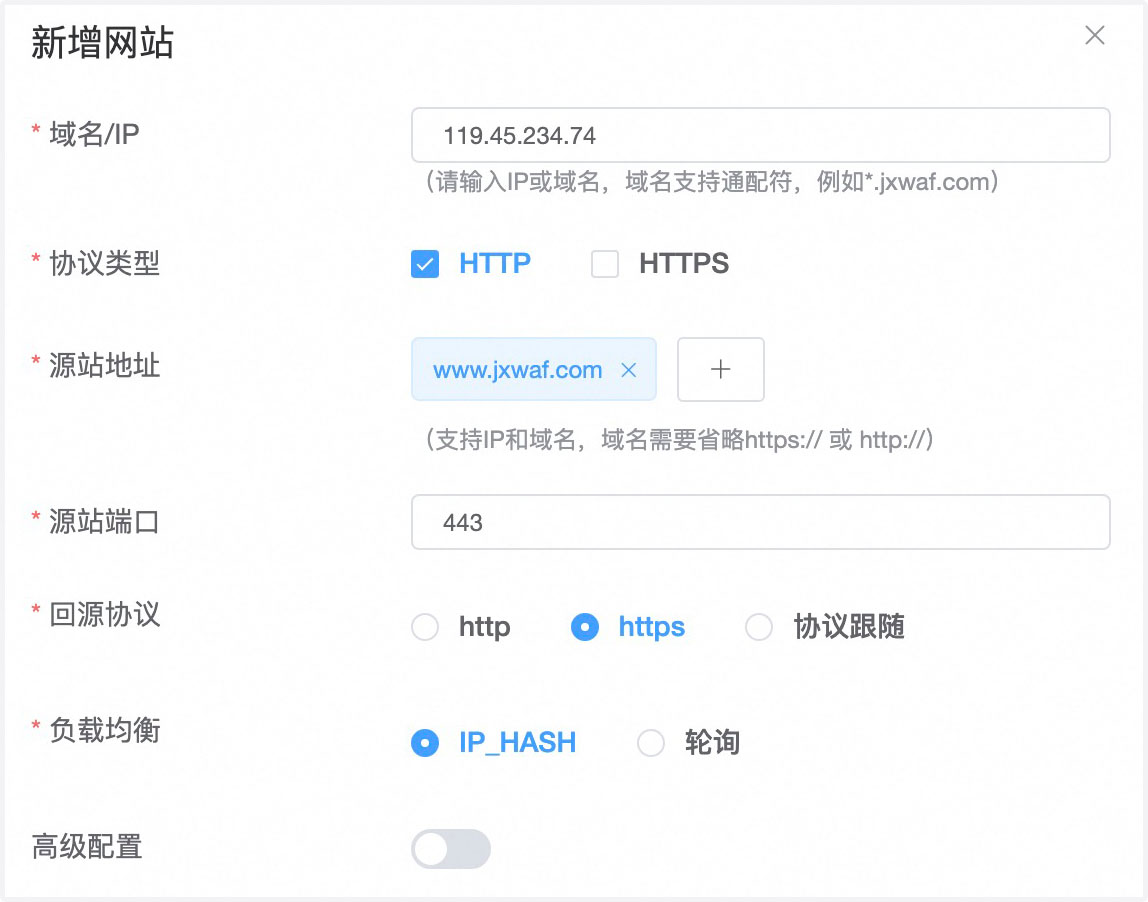
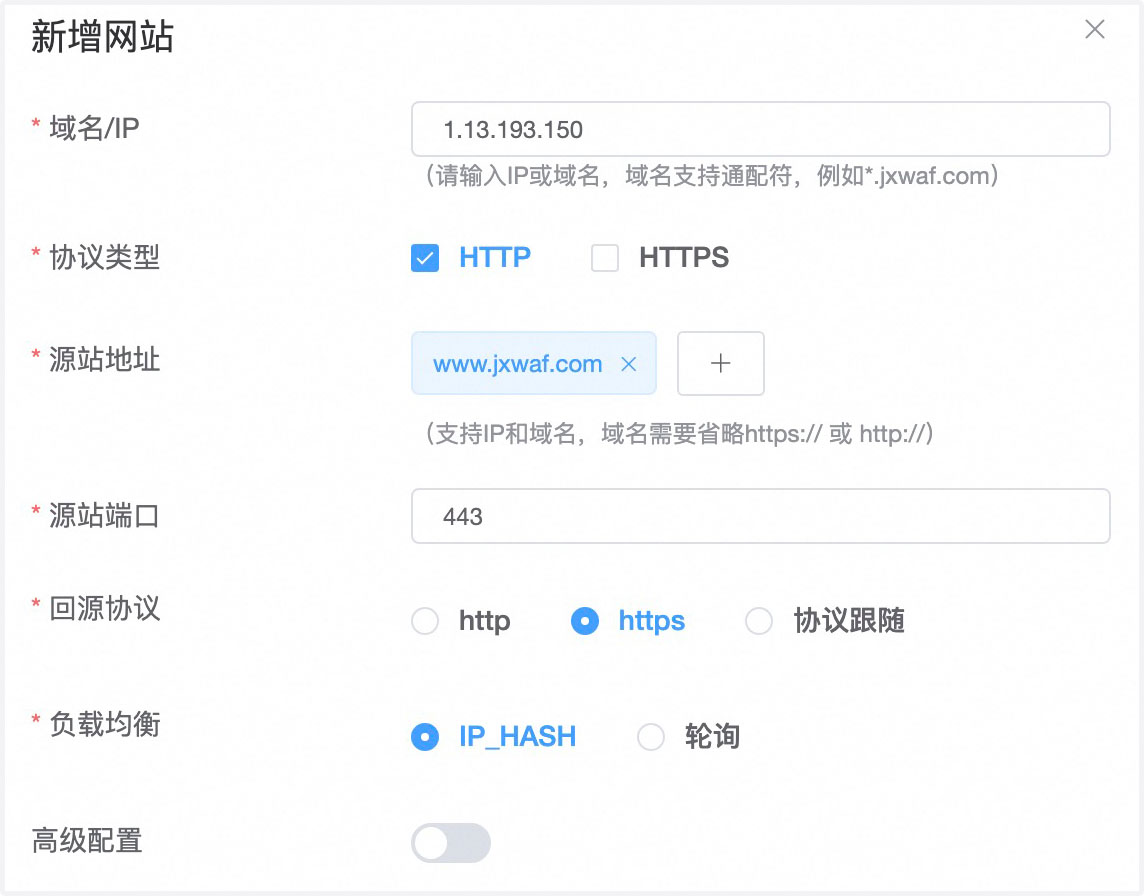
登录控制台后,在网站防护中点击新建网站,参考如下配置进行设置
配置完成后,回到服务器
[root@VM-0-11-centos test_env_cn]# pwd
/tmp/jxwaf-docker-file/test_env_cn
[root@VM-0-11-centos test_env_cn]# cd ../waf_test/
[root@VM-0-11-centos waf_test]# python waf_poc_test.py -u http://119.45.234.74
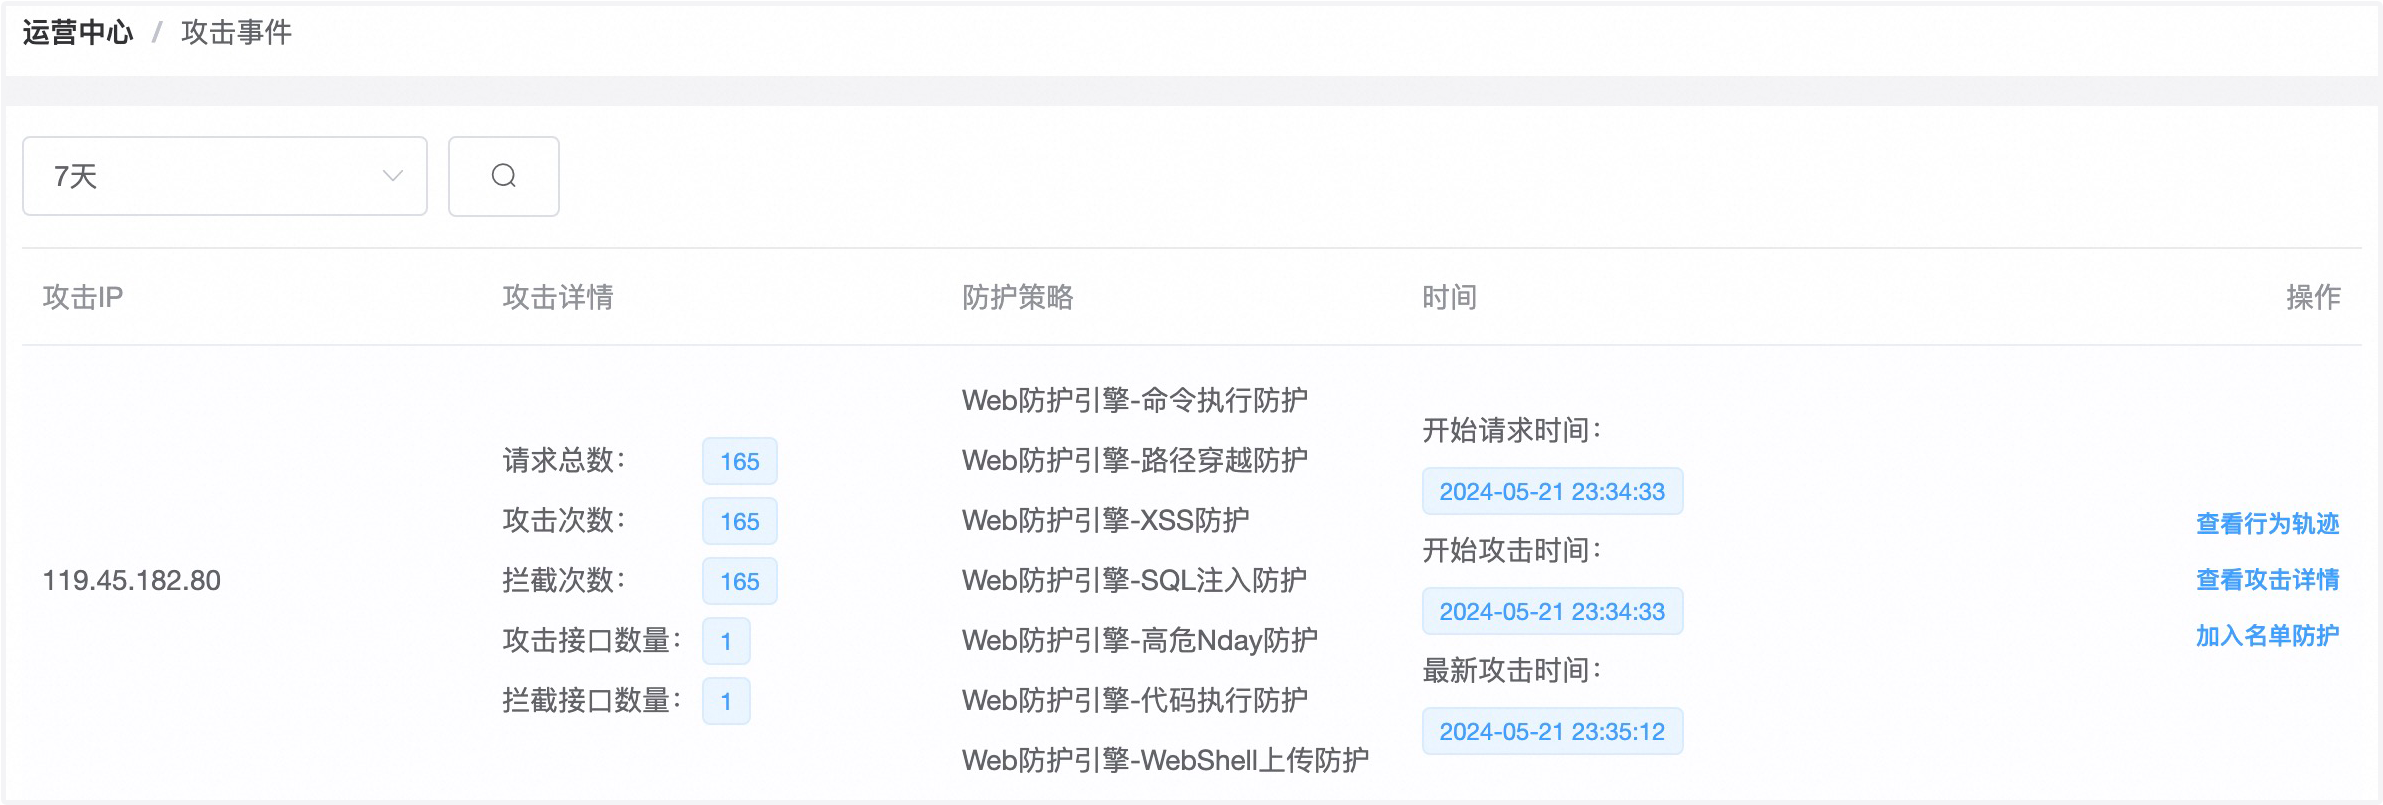
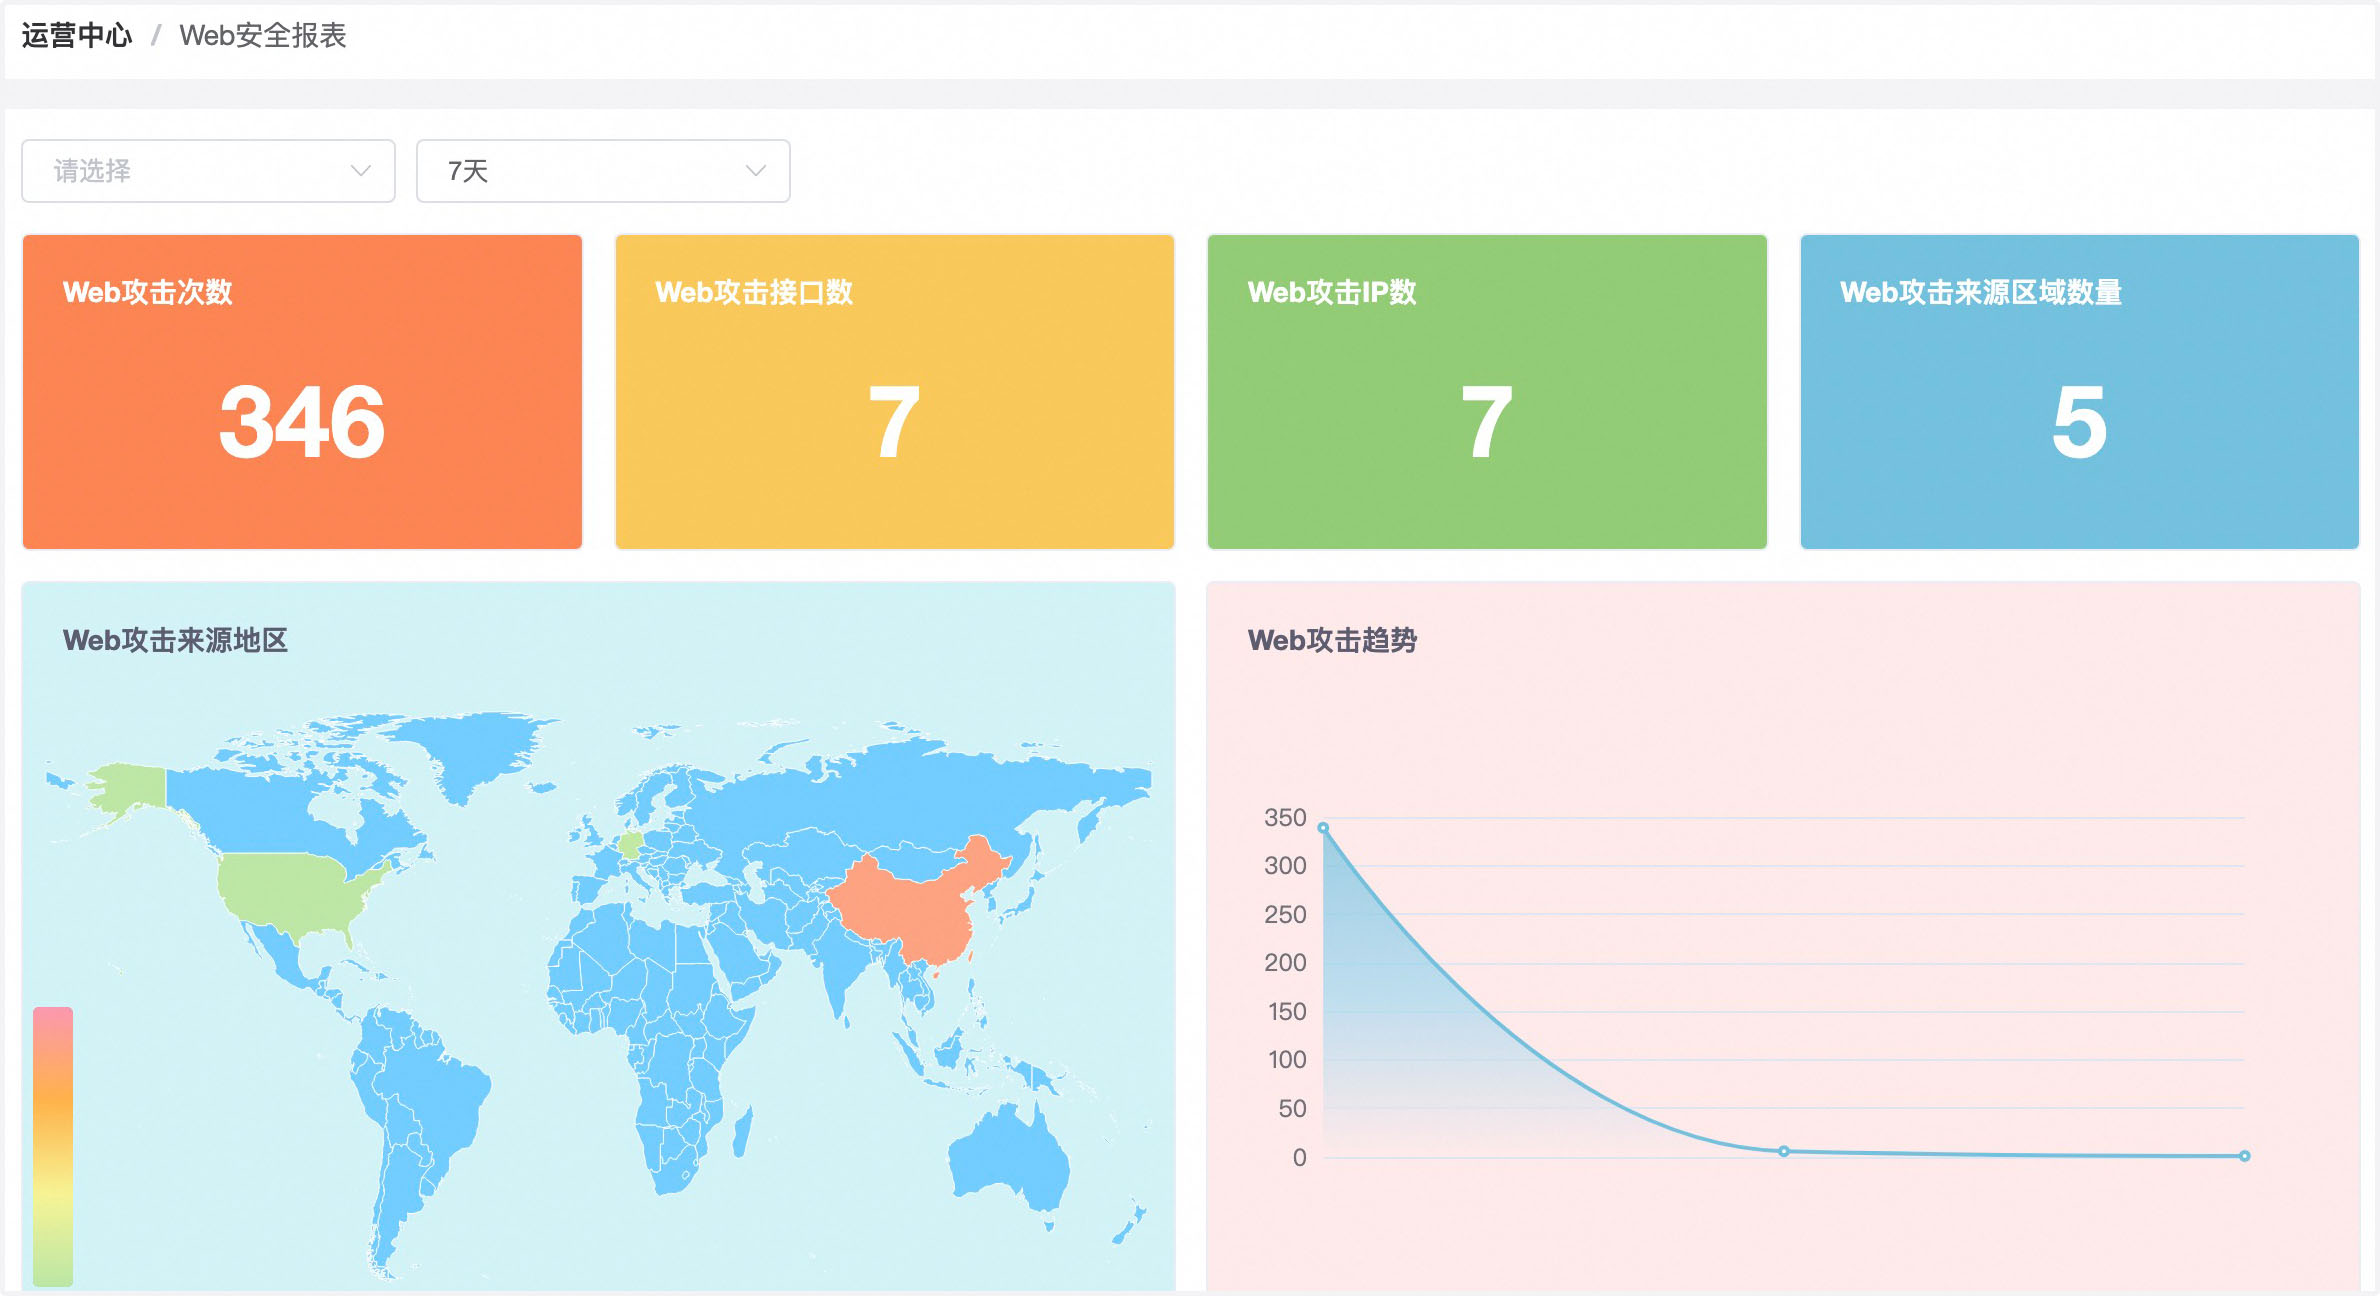
运行 waf 测试脚本后,即可在控制台中的运营中心查看防护效果
# 生产环境部署
# jxwaf 控制台部署
服务器 IP 地址
- 公网地址: 175.27.128.142
- 内网地址: 10.206.0.10
# curl -sSLk https://get.docker.com/ | bash
# service docker start
# yum install git -y
# git clone https://github.com/jx-sec/jxwaf-docker-file.git
# cd jxwaf-docker-file/prod_env/jxwaf-mini-server
# docker compose  up -d
国内网络可以参考下面命令执行
# curl -fsSL https://get.docker.com | bash -s docker --mirror Aliyunservice docker start
# service docker start
# yum install git -y
# git clone https://github.com/jx-sec/jxwaf-docker-file.git
# cd jxwaf-docker-file/prod_env_cn/jxwaf-mini-server
# docker compose  up -d
部署完成后,访问控制台地址 http://175.27.128.142:8000 , 第一次访问控制台会自动跳转到帐号注册页面 。 从安全性考虑,建议对访问控制台的 IP 地址进行限制,例如只允许办公网 IP 访问。
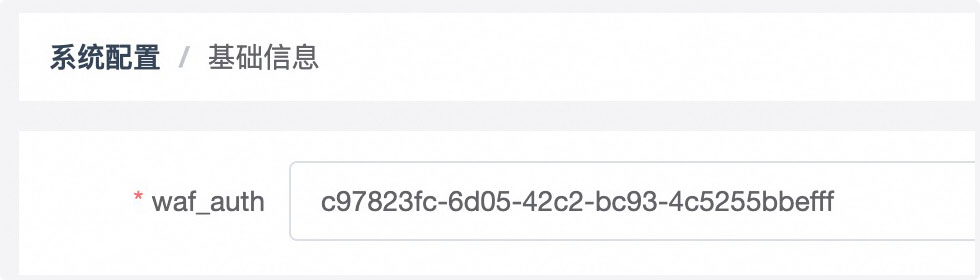
完成注册并登录控制台后,点击 系统配置 -> 基础信息 页面,查看 waf_auth,后续节点配置需要
# jxwaf 节点部署
# 容器化部署(推荐)
服务器 IP 地址
- 公网地址: 1.13.193.150
- 内网地址: 10.206.0.3
# curl -sSLk https://get.docker.com/ | bash
# service docker start
# yum install git -y
# git clone https://github.com/jx-sec/jxwaf-docker-file.git
# cd jxwaf-docker-file/prod_env/jxwaf
# vim docker-compose.yml
国内网络可以参考下面命令执行
# curl -fsSL https://get.docker.com | bash -s docker --mirror Aliyun
# service docker start
# yum install git -y
# git clone https://github.com/jx-sec/jxwaf-docker-file.git
# cd jxwaf-docker-file/prod_env_cn/jxwaf
# vim docker-compose.yml
修改文件中的 JXWAF_SERVER 和 WAF_AUTH
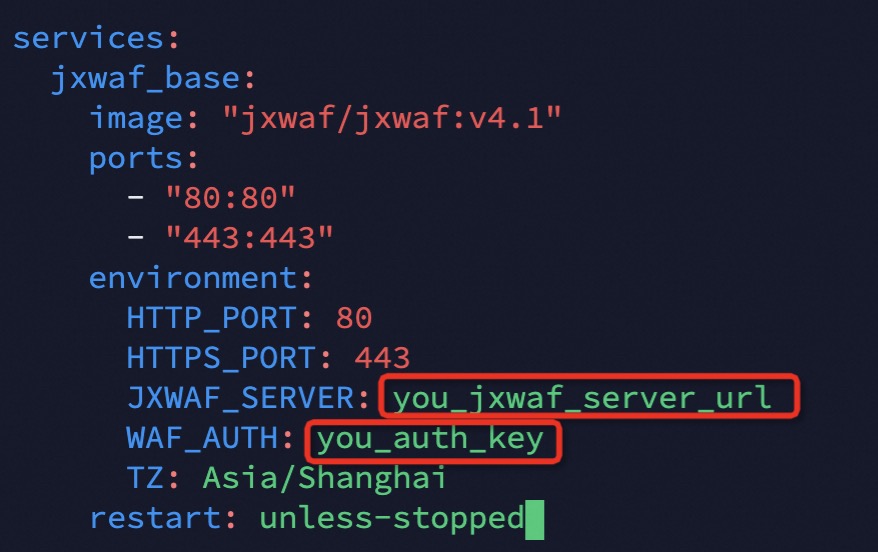
JXWAF_SERVER 的值为 jxwaf 控制台服务器地址,这里为 http://175.27.128.142:8000 ,注意这里地址不能带路径,即 http://175.27.128.142:8000/ 是错误输入
其中 WAF_AUTH 为 系统配置 -> 基础信息 中 waf_auth 的值
修改后如下
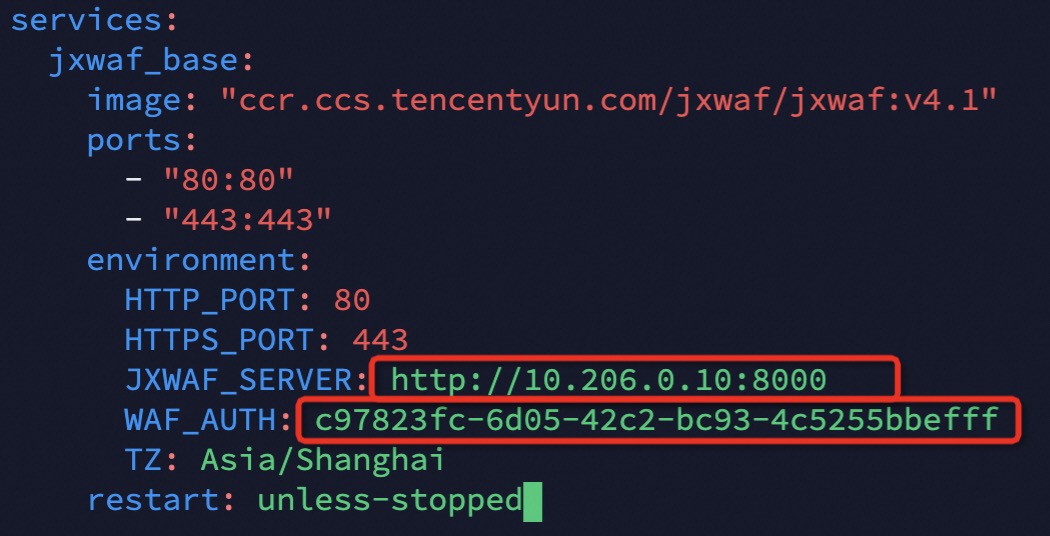
docker compose up -d
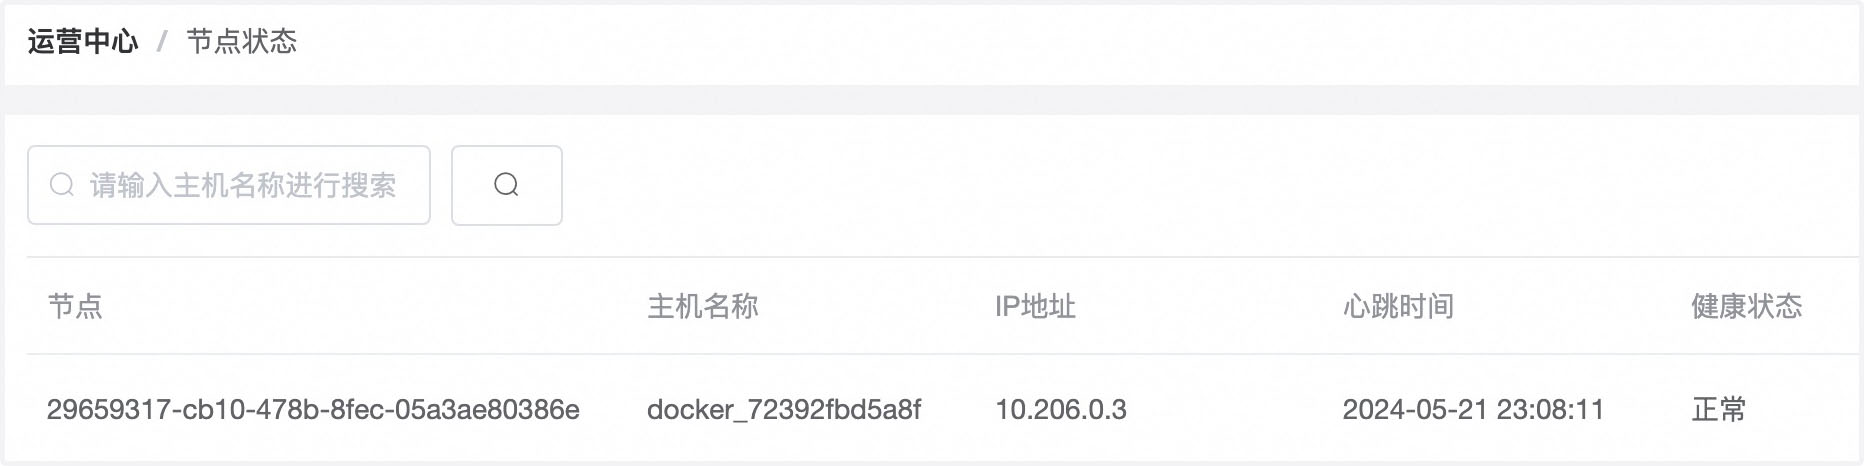
启动后,可以在 运营中心 -> 节点状态 查看节点是否上线
# 源代码部署
服务器 IP 地址
- 公网地址: 1.13.193.175
- 内网地址: 10.206.0.19
# yum install git -y
# git clone https://github.com/jx-sec/jxwaf.git
# cd jxwaf/
# sh install_waf.sh
国内网络可以参考下面命令执行
# yum install git -y
# git clone https://gitee.com/mirrors/jxwaf.git
# cd jxwaf/
# sh install_waf.sh
运行完成后,可以看到类似返回,即安装成功
nginx: the configuration file /opt/jxwaf/nginx/conf/nginx.conf syntax is ok
nginx: configuration file /opt/jxwaf/nginx/conf/nginx.conf test is successful
执行节点初使化命令
# python tools/jxwaf_init.py --waf_auth=ee747988-612b-4790-b8ea-fb49c04fc1ea --waf_server=http://10.206.0.10:8000
waf_server 的值为 jxwaf 控制台服务器地址,这里为 http://10.206.0.10:8000 ,注意这里地址不能带路径,即 http://10.206.0.10:8000/ 是错误输入
其中 waf_auth 为 系统配置 -> 基础信息 中 waf_auth 的值
运行命令完成后,可以看到类似返回,即初使化配置成功
config file:  /opt/jxwaf/nginx/conf/jxwaf/jxwaf_config.json
config result:
waf_auth is ee747988-612b-4790-b8ea-fb49c04fc1ea
waf_update_website is http://10.206.0.10:8000/waf_update
waf_monitor_website is http://10.206.0.10:8000/waf_monitor
waf_name_list_item_update_website is http://10.206.0.10:8000/waf_name_list_item_update
auth result:
try to connect jxwaf_server auth waf_auth,result is True
执行启动命令
# /opt/jxwaf/nginx/sbin/nginx
启动后,可以在 运营中心 -> 节点状态 查看节点是否上线
# jxlog 部署
服务器 IP 地址
- 内网地址: 10.206.0.13
# curl -sSLk https://get.docker.com/ | bash
# service docker start
# yum install git -y
# git clone https://github.com/jx-sec/jxwaf-docker-file.git
# cd jxwaf-docker-file/prod_env/jxlog
# docker compose  up -d
国内网络可以参考下面命令执行
# curl -fsSL https://get.docker.com | bash -s docker --mirror Aliyunservice docker start
# service docker start
# yum install git -y
# git clone https://github.com/jx-sec/jxwaf-docker-file.git
# cd jxwaf-docker-file/prod_env_cn/jxlog
# vim docker-compose.yml
部署完成后,在控制台中 系统配置 -> 日志传输配置 完成如下配置
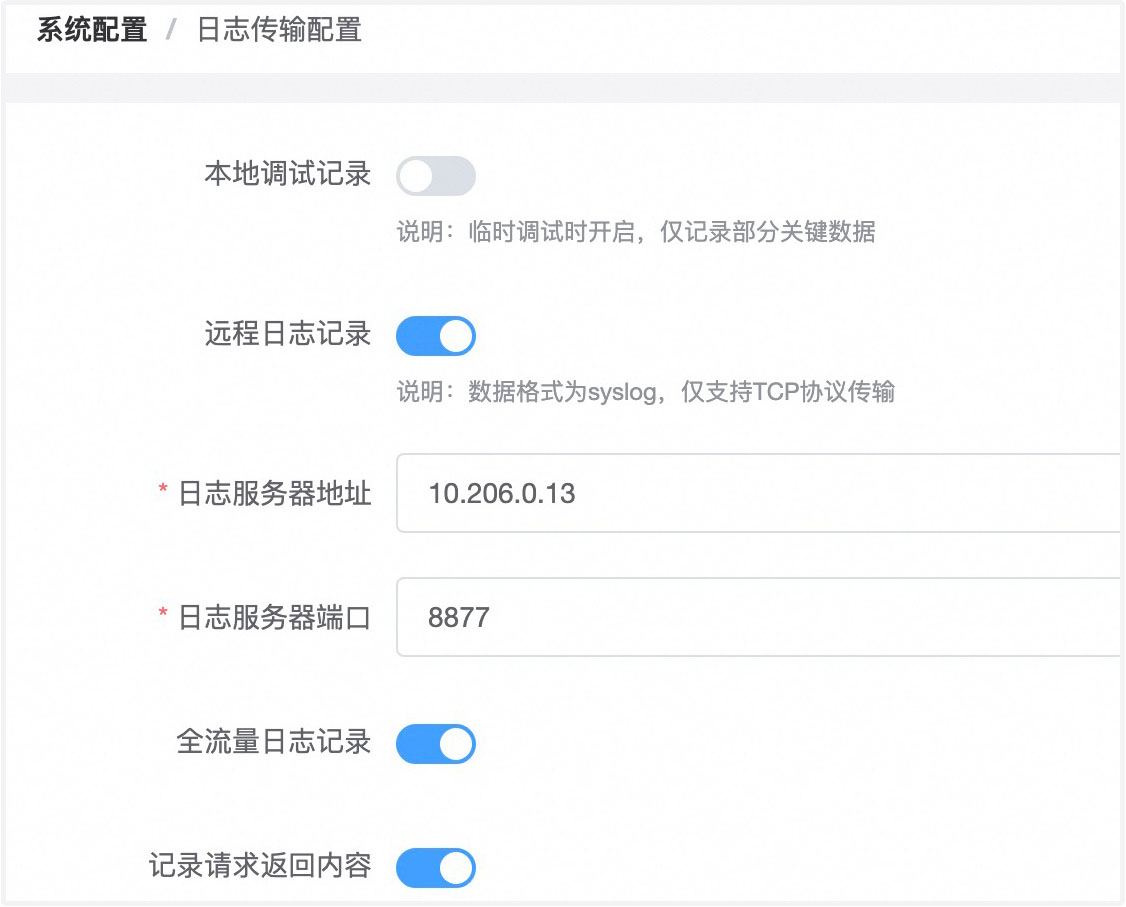
在 控制台 系统配置 -> 日志查询配置 完成如下配置,其中 ClickHouse 数据库的帐号密码可以在 docker-compose.yml 文件中修改

# 效果验证
在控制台 防护管理 -> 网站配置 ,点击新建网站,参考如下配置进行设置
配置完成后,回到 jxlog 服务器
[root@VM-0-13-centos jxlog]# pwd
/root/jxwaf-docker-file/prod_env_cn/jxlog
[root@VM-0-13-centos jxlog]# cd ../../waf_test/
[root@VM-0-13-centos waf_test]# python waf_poc_test.py -u http://1.13.193.150
运行 waf 测试脚本后,即可在控制台中的 运营中心 -> 攻击事件 查看防护效果